How to set up custom domains
By Megan Pierce
Using your own custom domains
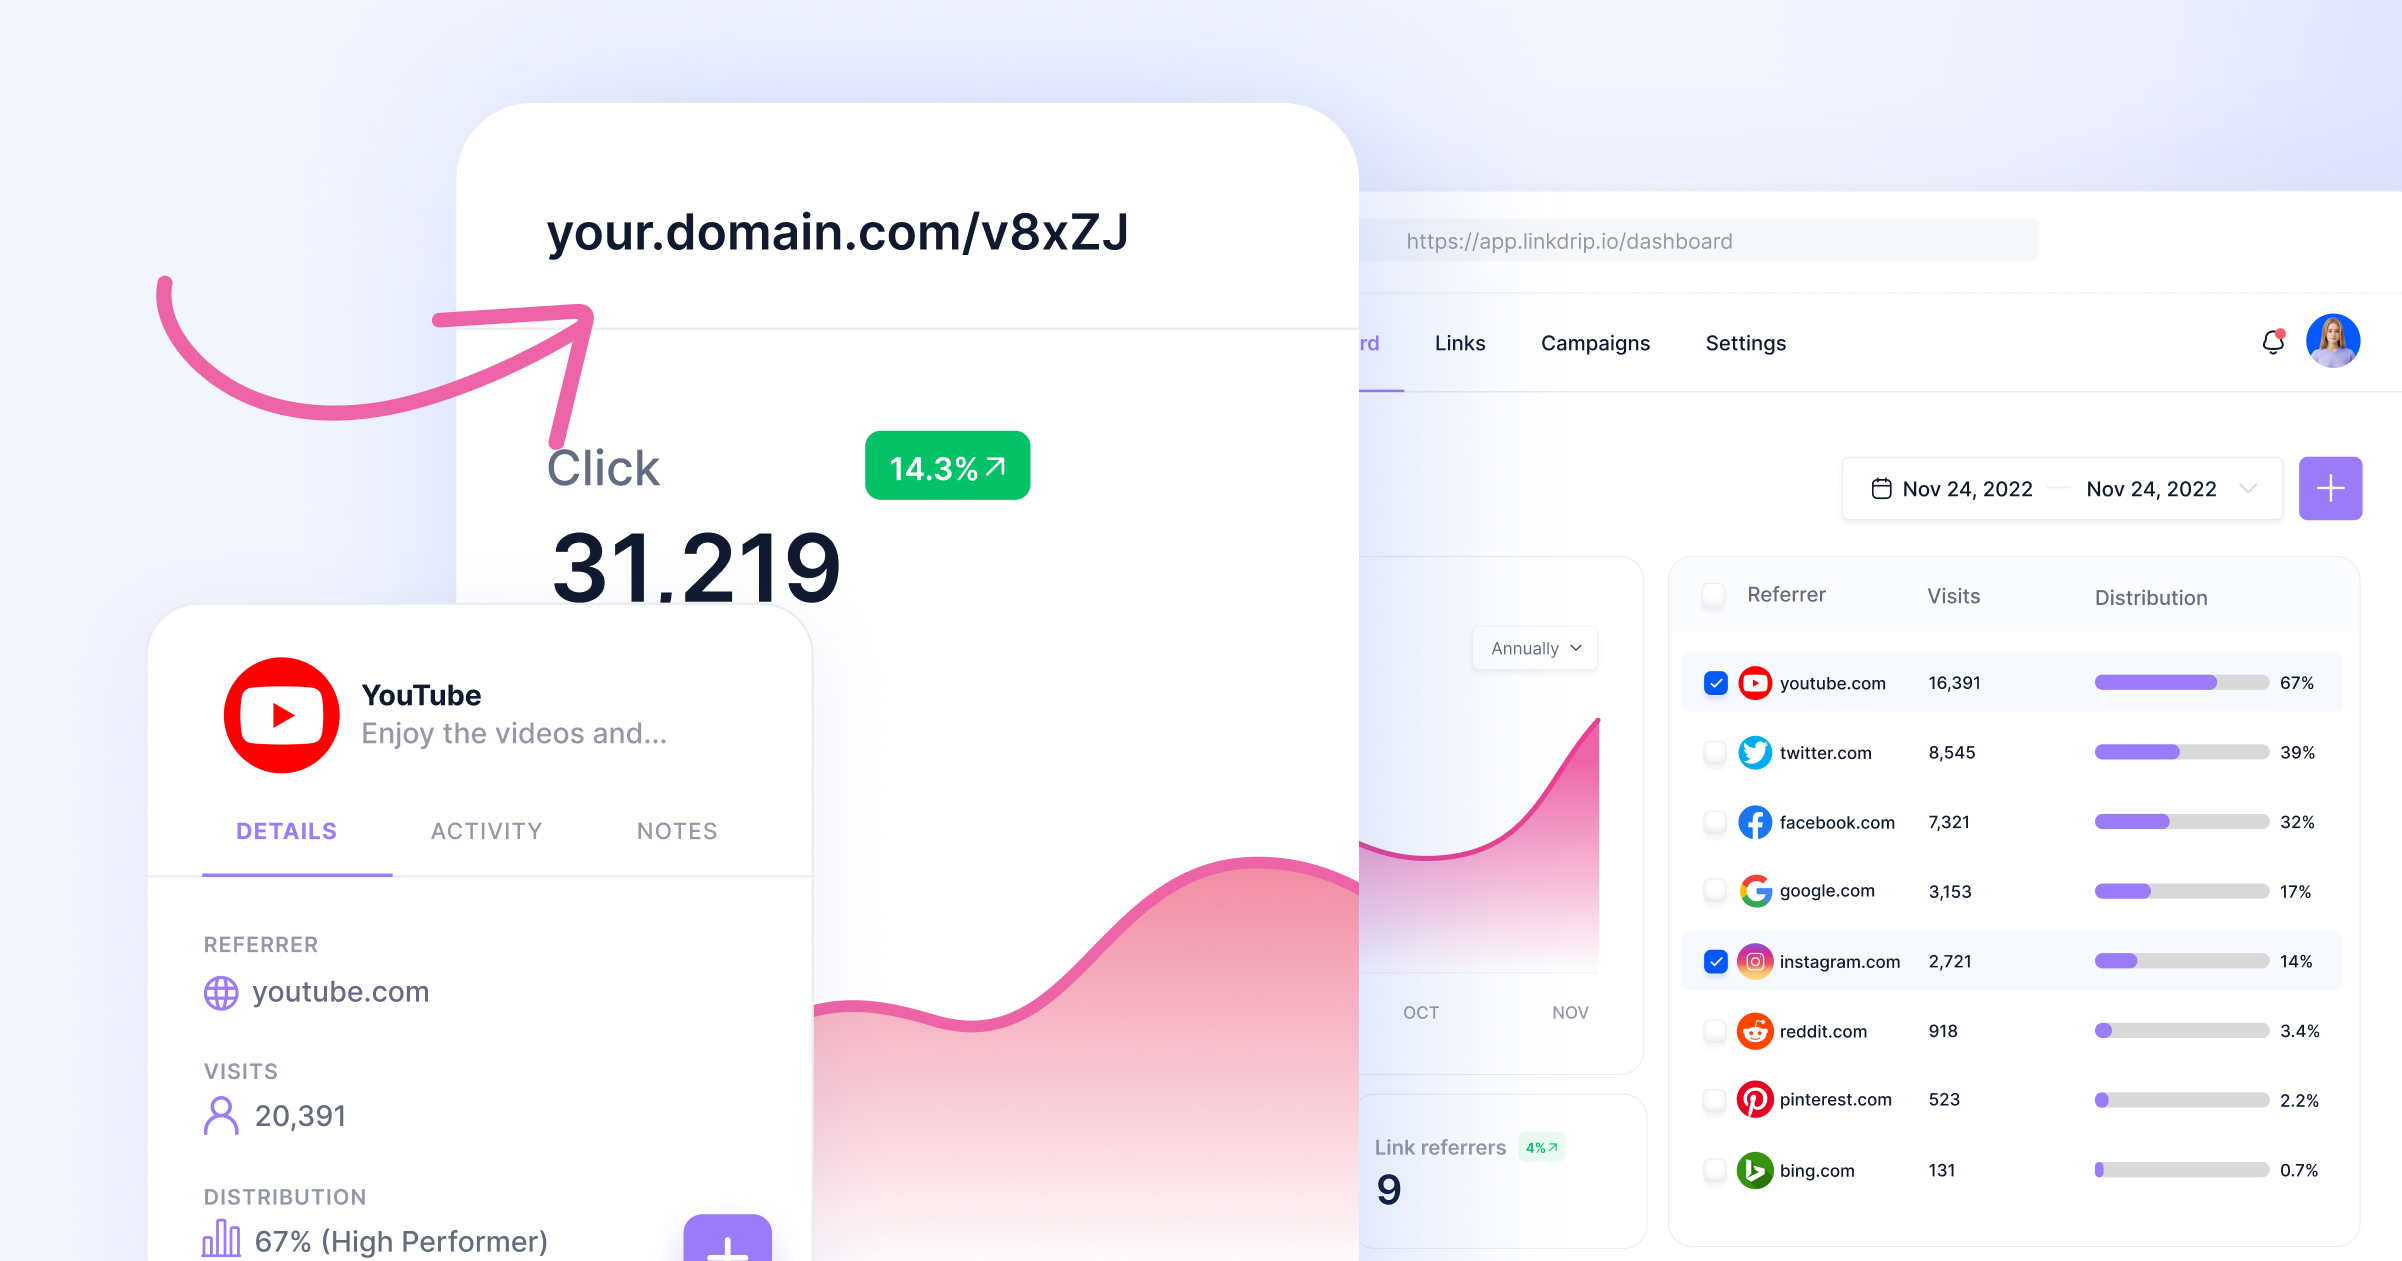
LinkDrip allows you to use your own custom domains for your shortened links.
So instead of e.g. rli.to/x7Sa9 you have this link on your own domain link.mycompany.io/x7Sa9
This makes your links appear on brand, using the domain your audience is used to seeing.
Setting up a custom domain
Go to the Settings page and click the Custom Domains menu button.
Enter the domain you wish to use, and click the Add domain button.
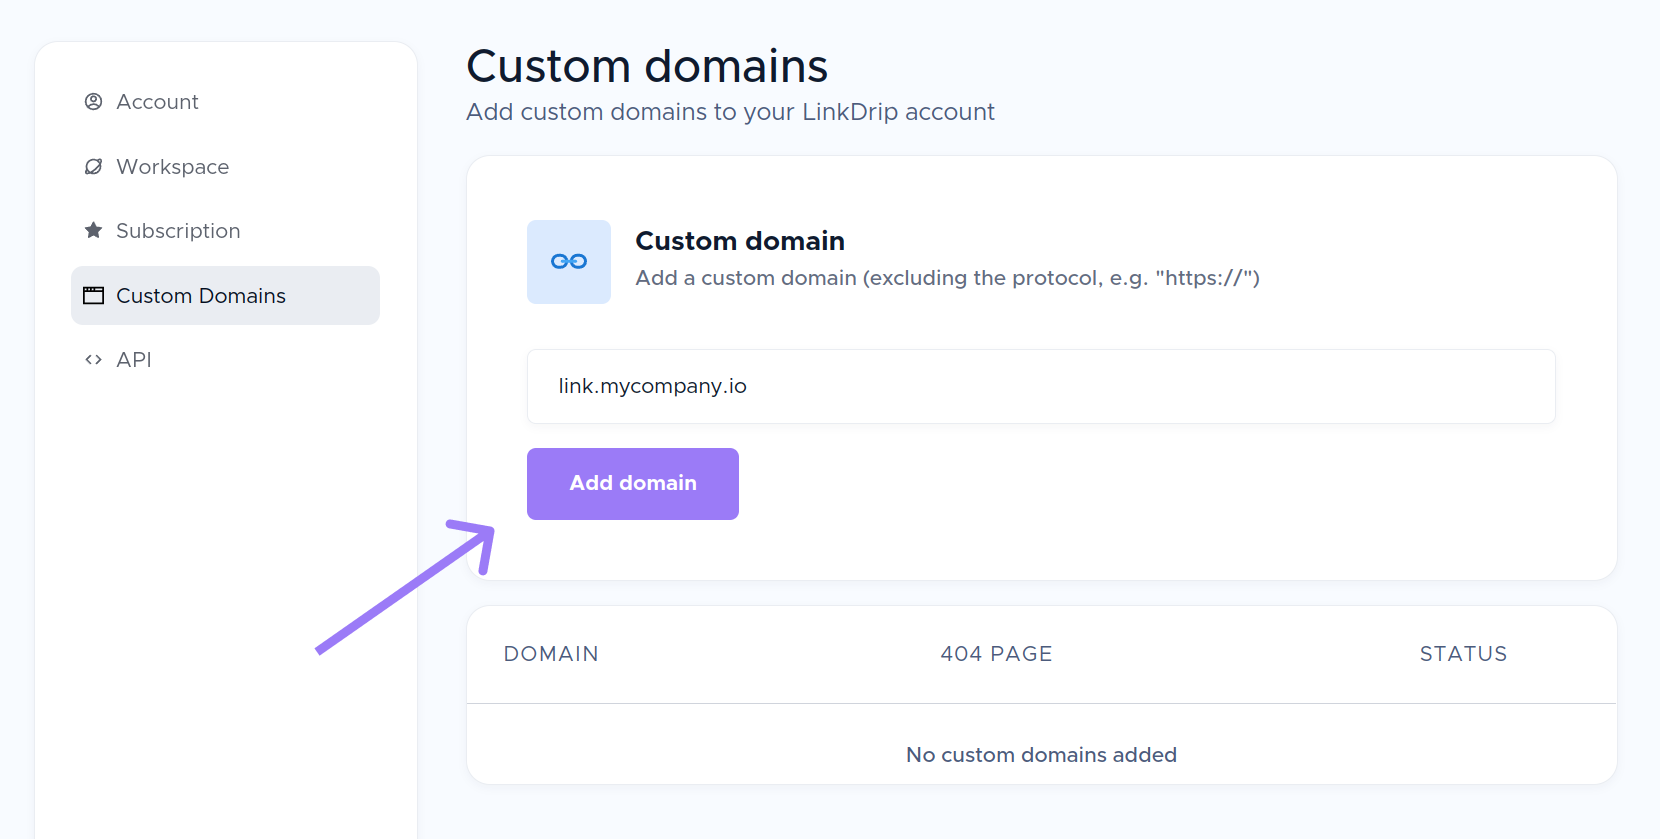
We do not recommend using a root domain (e.g. yourcompany.io).
Instead, use a subdomain like "link" (e.g. link.yourcompany.io).
Adding DNS Records
In order to make the custom domain work, we need to set up a DNS record.
After clicking the Add domain button, LinkDrip will give you a CNAME record that you need to set.
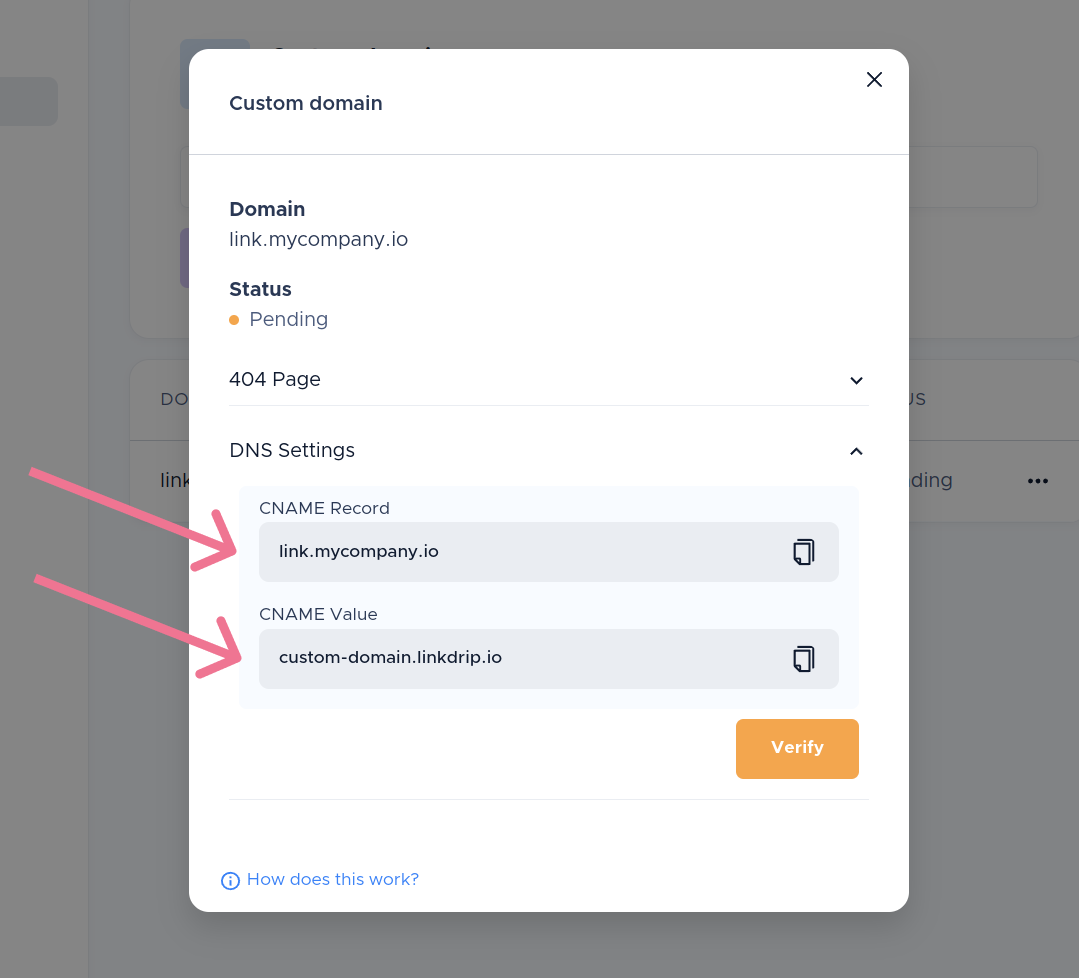
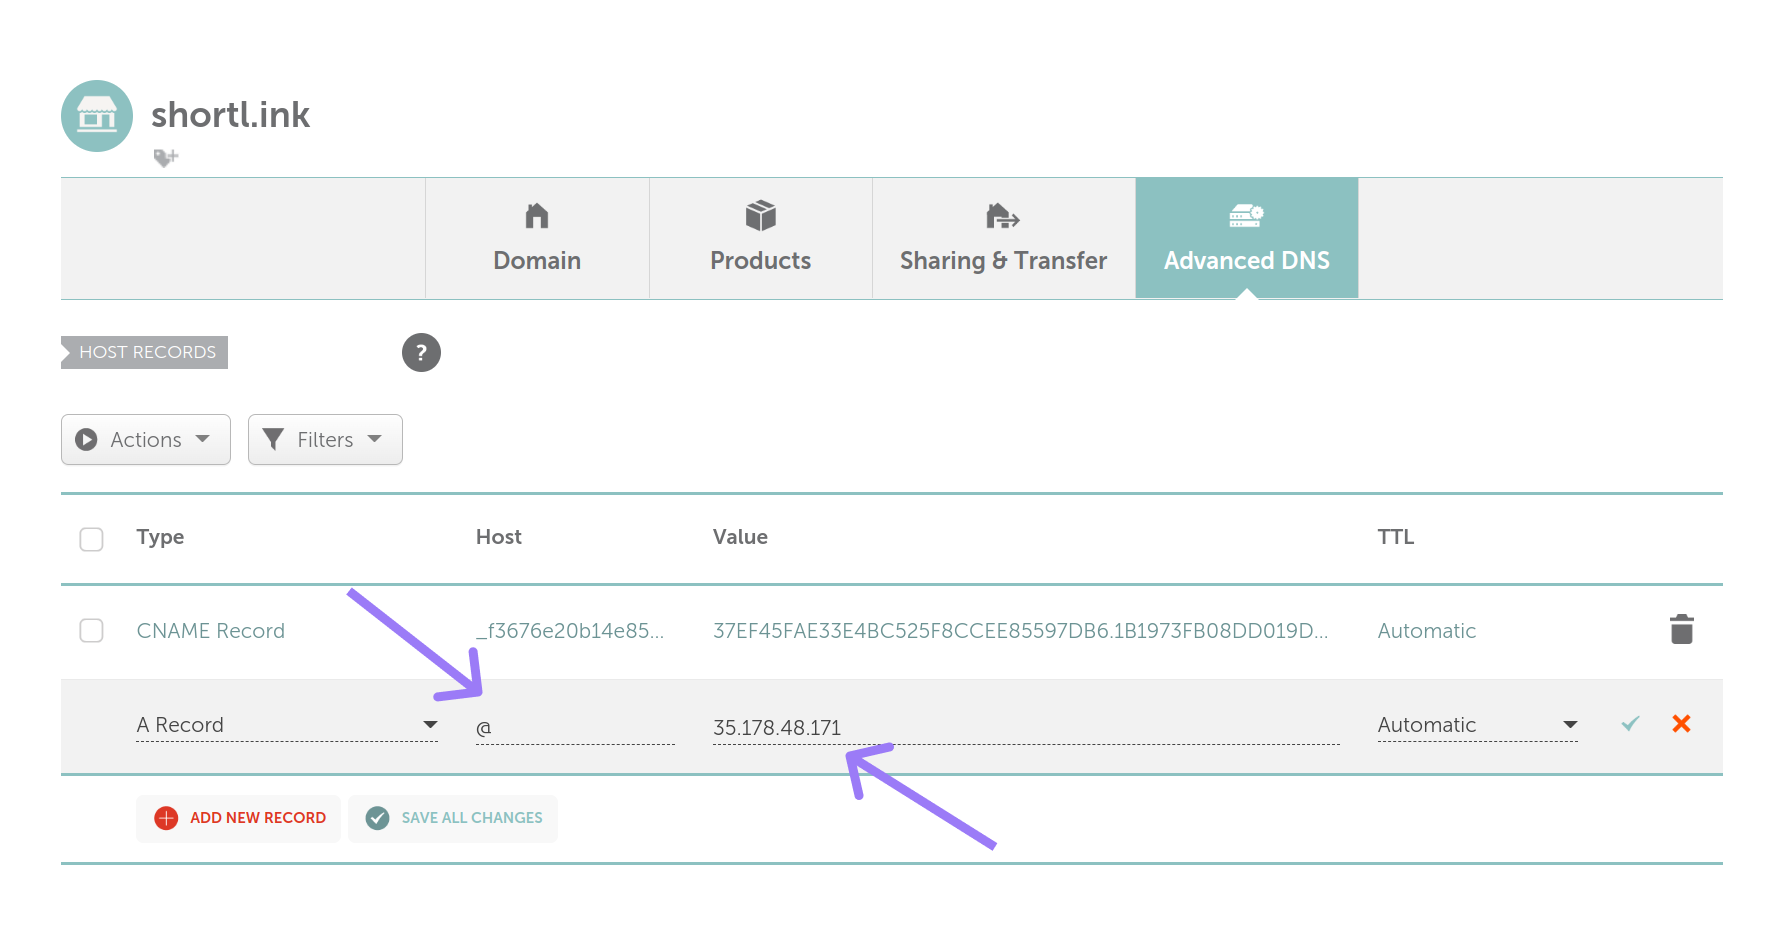
Go to your domain name registrar and add these two records under the DNS settings.
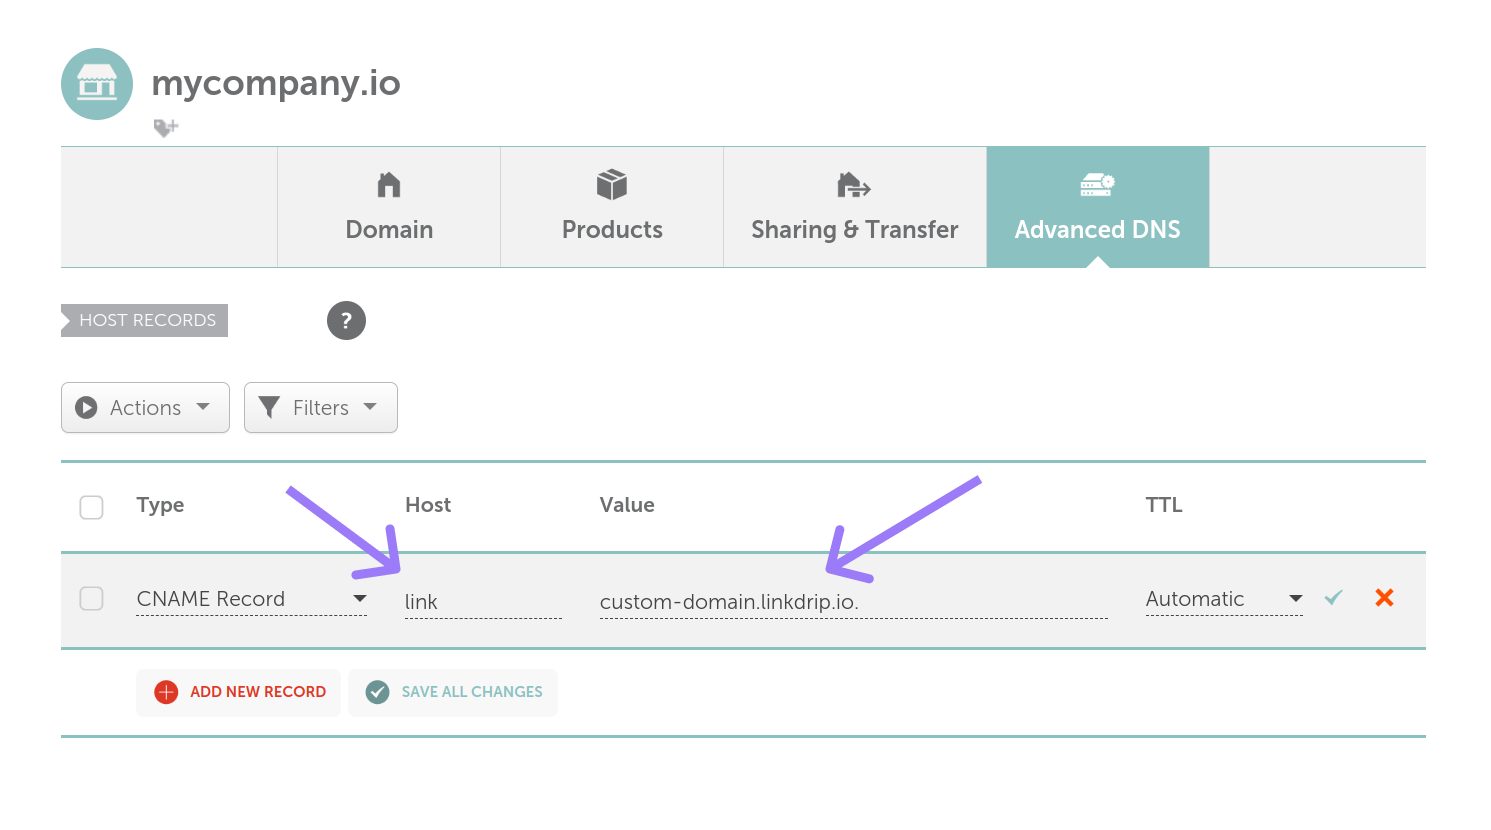
This is an example from Namecheap.
All providers differ a little, but the idea is the same. If you are in doubt about how to set this up, please contact support for the provider you are using.
Verify the domain
Now you need to wait a little for the DNS to propagate.
This can take anywhere from a few minutes to a few hours.
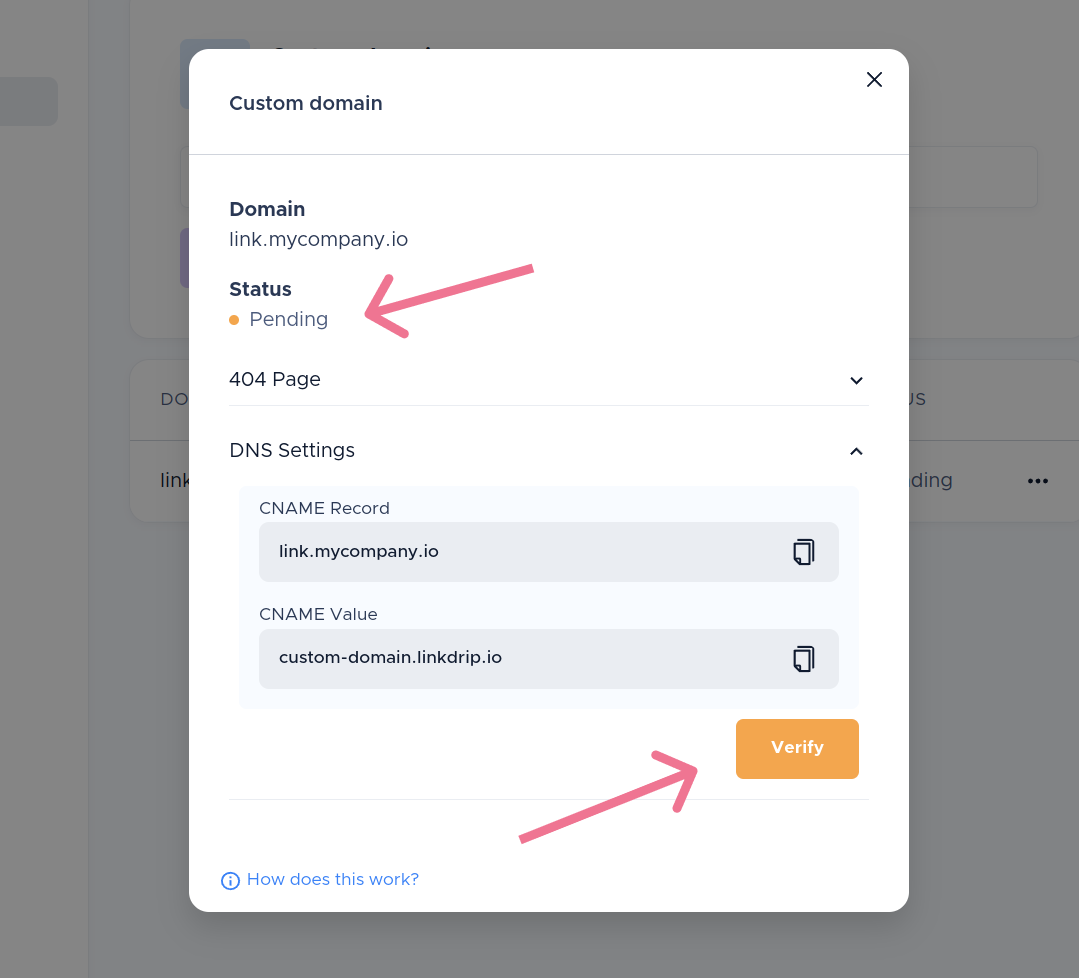
After waiting a little, you can try to click the Verify button.
If the domain is not ready yet, a warning will appear in LinkDrip.
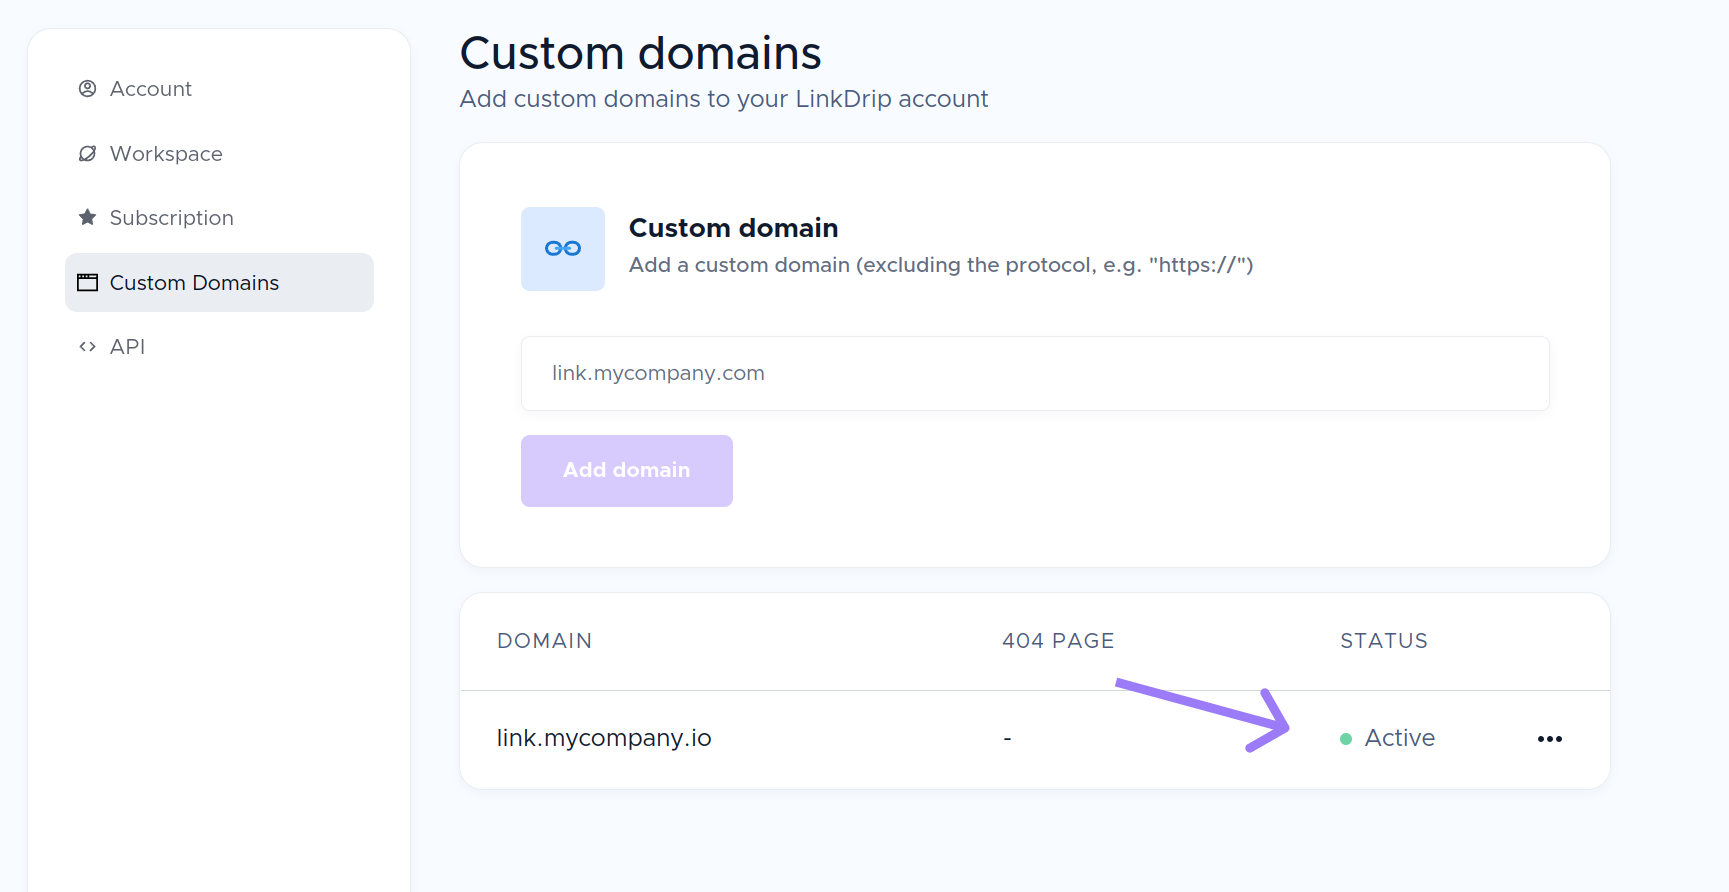
If everything went well, you should see your domain with the status "Active".
Use the domain
Congratulations 🥳
You are now all set up!
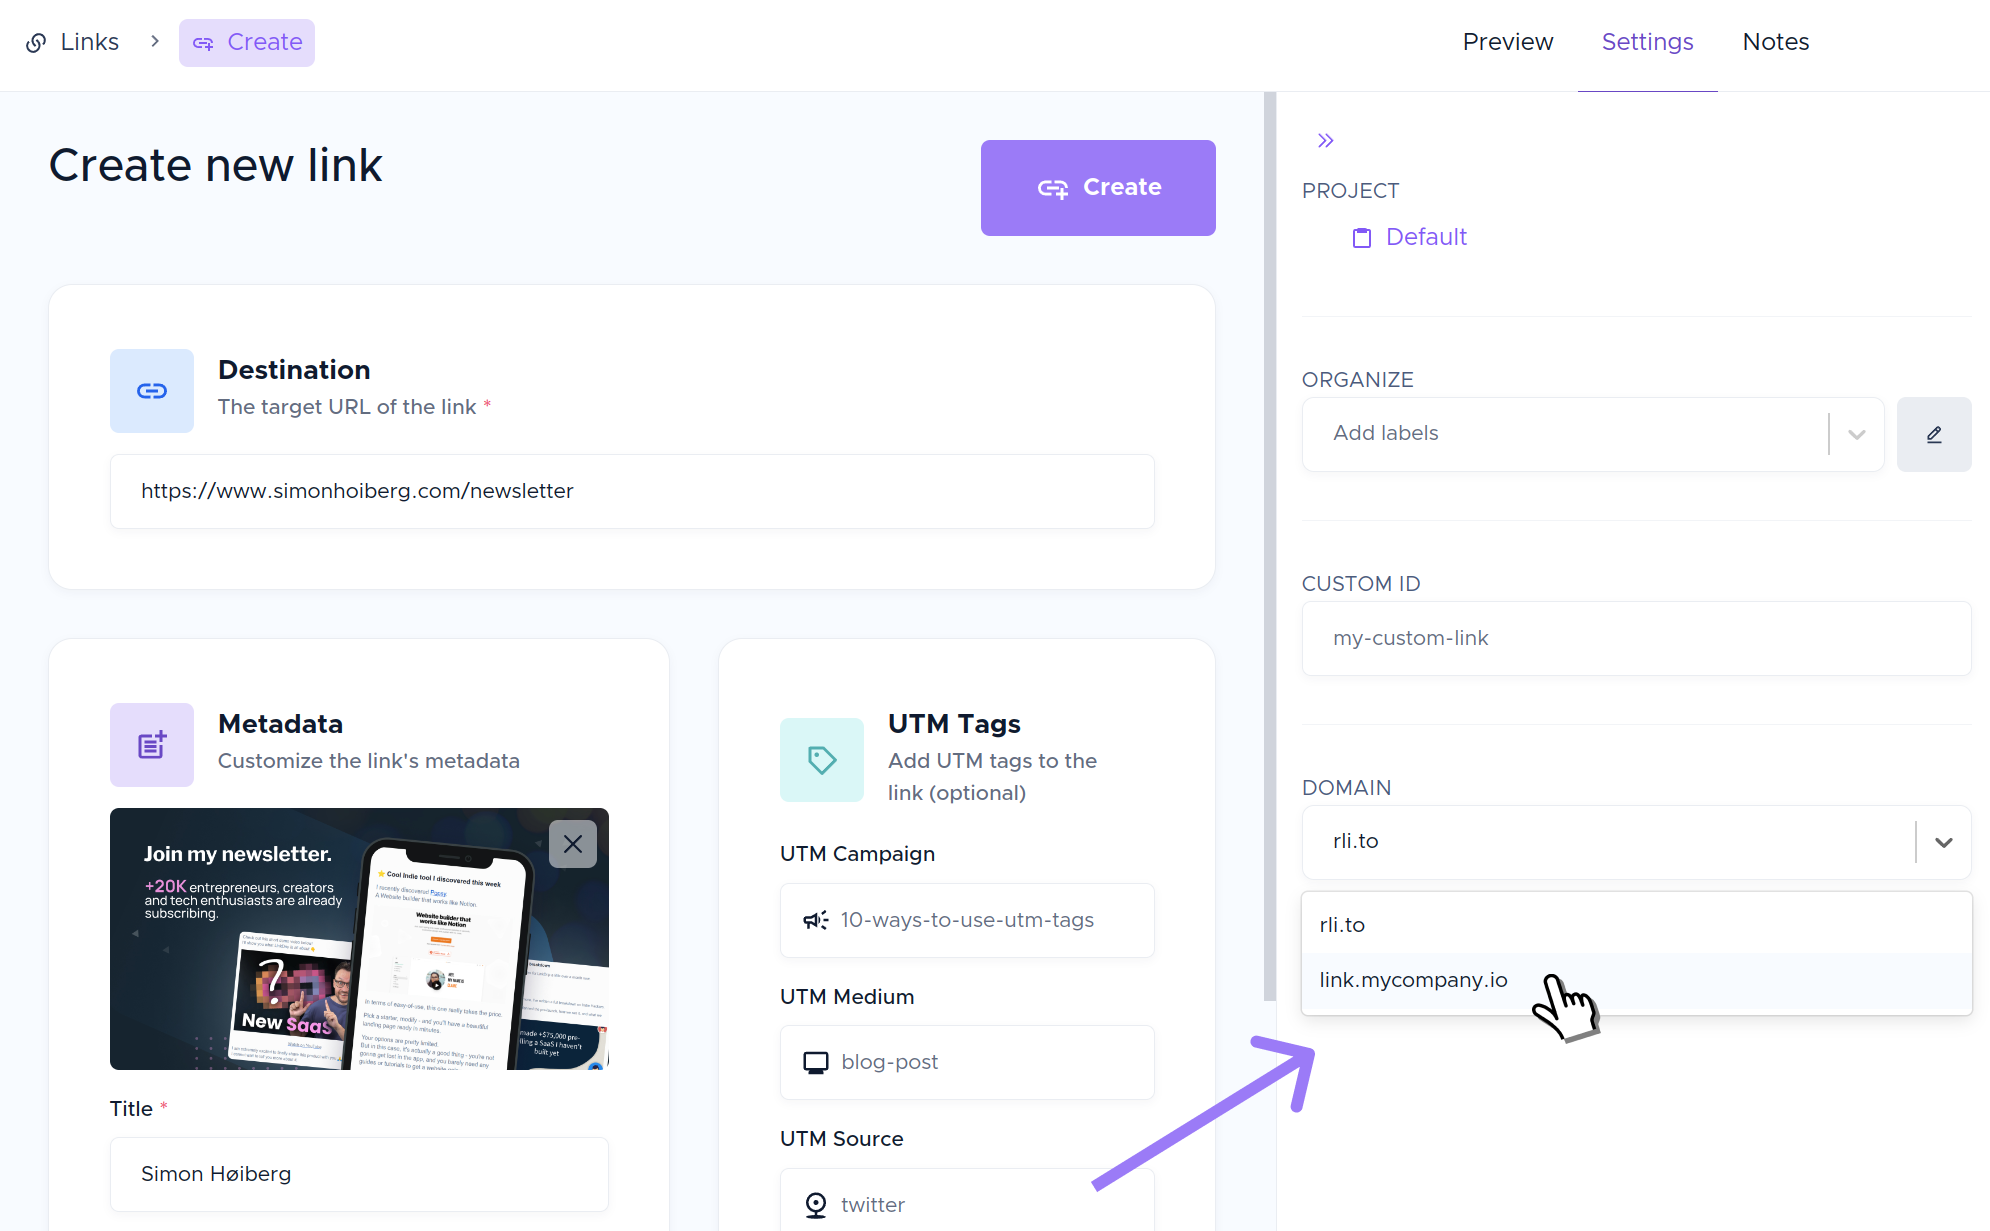
When you create a link, you can now pick your custom domain under the Settings tab in the right side pane.
Setting up a 404 page
This step is optional, but we recommend setting up a 404 page.
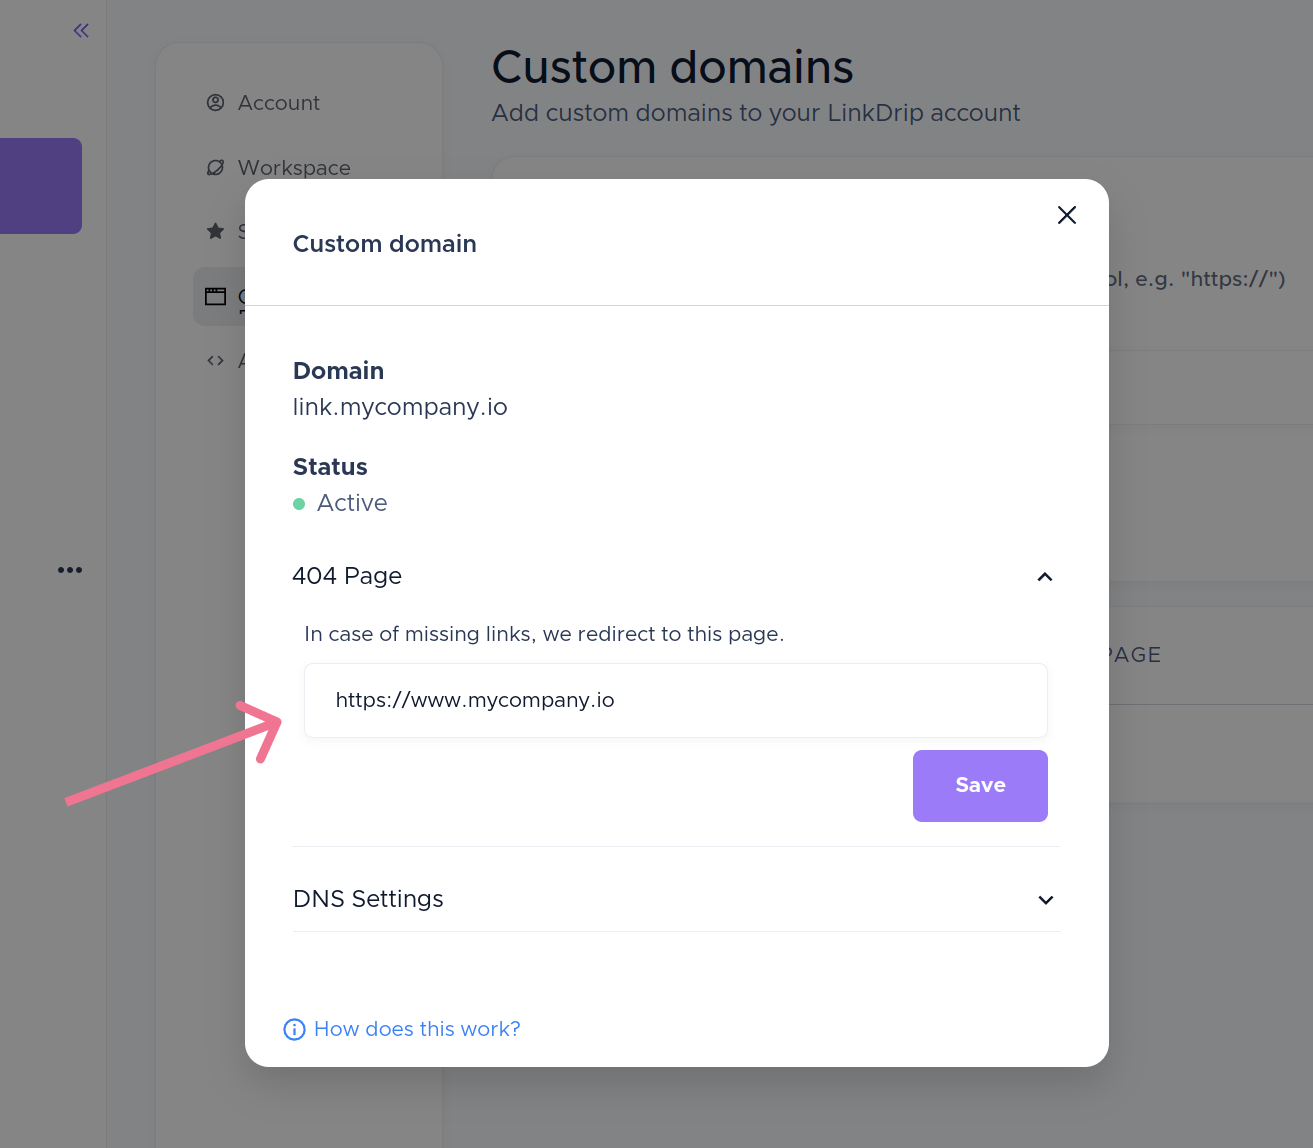
If LinkDrip cannot find the link ID that is used, we will simply redirect the viewer to this page.
We will redirect the user to linkdrip.io if you don't configure a 404 page yourself.
Using a root domain (optional)
If you are using a designated custom domain for your short links (e.g. shortl.ink), you probably want to use the root domain.
Some DNS providers doesn't allow setting up a CNAME record on root, so we can't use a record with CNAME -> custom-domain.linkdrip.io.
Instead, you can set up an A Record and use the on of the two IP addresses:
- 13.42.74.145
- 35.178.63.175
That's it 🙌
You should be set up now!